Hot Paws DIY Paw Print Kit Review – Making a Lasting Impression
This post may contain affiliate links. We may earn money or products from the companies mentioned in this post.
Back in 2018 we lost our Aussie mix, Linus to congestive heart failure. One year later we lost our black Lab, Stetson to cancer. We never made made a DIY paw print for our guys. However, we were lucky that the company that handled Linus and Stetson’s cremation did clay paw prints for us.
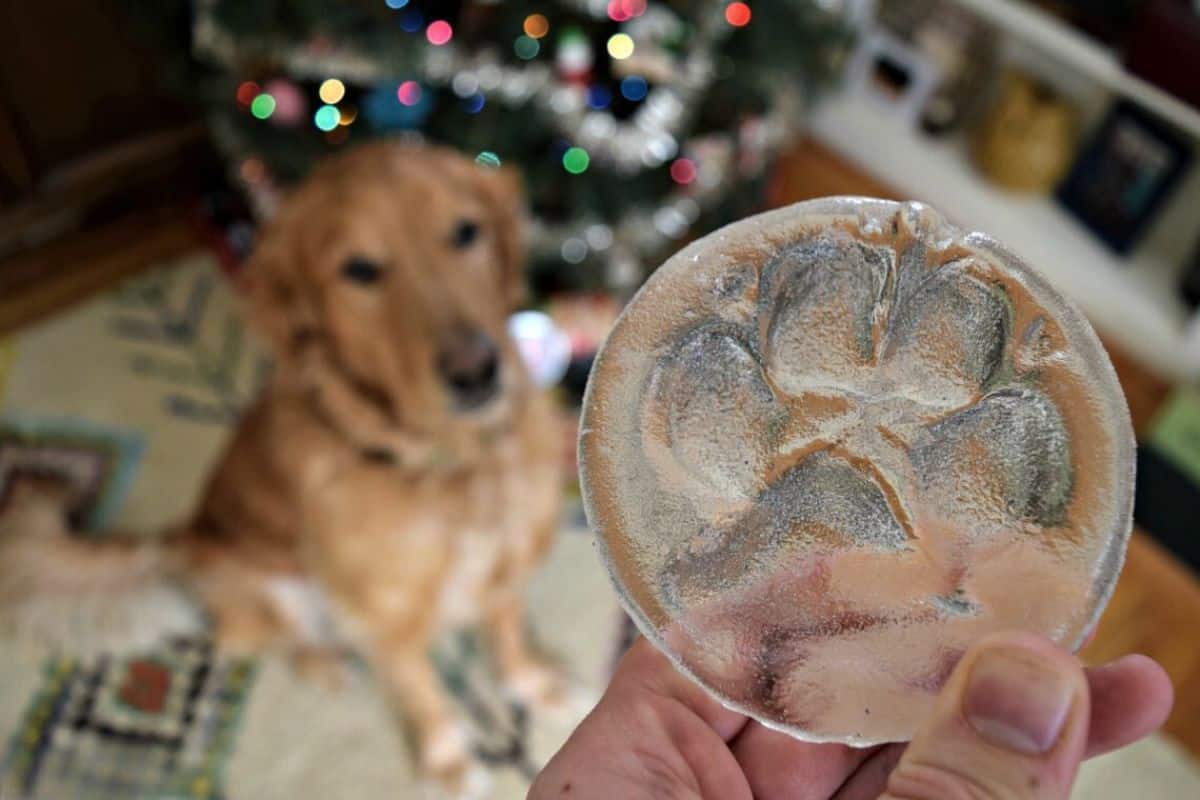
Today’s blog post is a review of the Hot Paws DIY Paw Print Kit. You can see an example of Harley’s paw print below.
You might not be able to tell from this picture but the paw print is actually cast in glass! Scroll down to the bottom to see more pics of Harley’s glass paw print.
Keep reading if you want to learn how to do your own DIY paw print for your pet.


UPDATE: This post was originally published on MyDogLikes on December 14th, 2016. We recently updated and republished here on PuppyInTraining.com.
Today we are very excited to let you know about Hot Paws – a unique product that gives you not only a priceless keepsake, but also a fun experience with your dog.
This one-of-a-kind art kit allows you to make a paw impression of your dog at home which will then be cast in glass!
In fact, we love it so much that it just had to earn a spot in our latest gift guide for dog lovers!
Hot Paws – DIY Paw Print Kit for Dogs
You may have seen other paw print keepsakes on the market using ink or even clay. The problem?
Ink is messy and clay will crack and crumble over time! Hot Paws on the other hand leaves you with a glass keepsake that is 3D, tough and long lasting.
About Hot Sand
Hot Sand is a glass studio on the Jersey shore which offers all sorts of glassblowing workshops and walk-in activities.
For over a decade now, they have been making paw impressions for their in-person clients and wanted to come up with a way for pet lovers all around the country to get one of these priceless keepsakes.
That is why they have developed Hot Paws – a convenient kit allowing customers to make these impressions at home, before sending them back to the studio to be cast in glass!
How Does the Process Work?


A few days after placing your order for a Hot Paws molding kit, you will receive a small package in the mail.
Inside you will find a tin, lump of pliable clay-like material, pre-paid shipping label, and detailed instructions.
Creating your mold is easy and only takes a few minutes…

Step 1: Preparing the Molding Material
First, grab the lump out of the tin and form it into a smooth round ball. The material is completely non-toxic so you need not worry about it’s safety around you or your pet.


Next, flip over the bottom of your Hot Paws tin and set your ball on the top.


Now, you will want to flatten out your ball to form a disc. You can conveniently use the top lid of the canister to get a nice even surface.


Note the small raised rim around the edge of the tin – this shows you the maximum diameter that your disk can be while still fitting back into the container.
Make sure that you do not extend past this point when you are pressing out your disc!
Step 2: Making the Paw Impression
Now that you have your disc all ready to go, it is time to cast your dogs paw print. Depending on your dog this may be easier standing up or lying down.
We chose to make the impression as Harley was lying down so we could take our time with it and knew he would be less likely to move.


All you need to do is take one of their Paws and press it firmly into the molding material.
Do not press too hard or you will flatten out the disc so much that it won’t fit back into the container! Keep your eye on that raised rim to make sure your size is on target.

One of the best things about Hot Paws is that if you mess it up on the first try it’s no big deal!
Simply roll it back into a ball and flatten once again and it’s ready to make a new impression. (Harley’s paw is so large that we ended up doing it 3 times to make sure it fit nicely within the bounds of the tin!)


Step 3: Sending Back the Mold
Once you are happy with your impression, it is ready to be sent back to Hot Sand for casting.
For your convenience they have included a prepaid shipping label, and an informational card inside.
Just fill out your return address, place your tin in the package, and drop it in the mail!
Want the Casting Sent Back to a Different Address?
No problem, just include that info on the card inside the envelope and Hot Sand will send it to them directly.
What an awesome idea for someone away at college missing their beloved pup!
You can also order more than 1 glass casting in case you want one at your home as well!

Step 4: Wait Patiently (If you can!)
Admittedly this is the toughest part of the entire process! After you place your Hot Paws back in the mail it will take a few weeks to make its way back to you.
In the mean time, Hot Sand is busy making a mold from your impression and filling it with molten glass!
You can even request that your impression be sent back to you in case you ever want to order another one!


Taking a Look at the Final Product
Your Hot Paws will arrive in the same tin, packed carefully with foam on both sides. The glass is smooth on one side, with a 3D impression on the reverse.
As you can see above, our Hot Paws came out great. The impression is so detailed that you can even feel the texture of the paw pads!
The final product has a nice weight to it and is very durable as well. While not completely clear, it is see through, and has really cool optical properties.
It has been sitting on my desk for a couple of weeks and I just love looking at it and touching it!


Why My Dog Likes Hot Paws DIY Paw Print Kit
Most importantly, this is a keepsake that we will cherish forever.
Being able to run your fingers along a 3D print of your dogs paw is a personal experience that I know will mean a lot when Harley is no longer with us. 🙁
The process itself could not be easier and was actually pretty fun. We loved that the kit includes everything you need and the price includes all 3 shipping transports as well.
Hot Paws is a really unique product that would make an amazing gift for any dog lover!
Want to Try out Hot Paws for Yourself?
Check out Hot Paws on their website.
Save To Pinterest


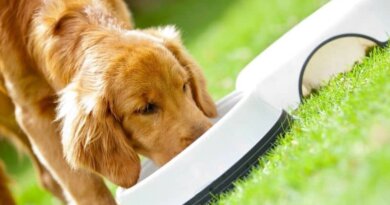
Top Picks For Our Puppies
- BEST PUPPY TOY
We Like: Calmeroos Puppy Toy w/ Heartbeat and Heat Packs – Perfect for new puppies. Helps ease anxiety in their new home. - BEST DOG CHEW
We Like: Mighty Paw Naturals Bully Sticks – All of our puppies love to bite, nip, and chew. We love using Bully Sticks to help divert these unwanted behaviors. - BEST DOG TREATS
We Like: Crazy Dog Train-Me Treats – We use these as our high-value treats for our guide dog puppies. - BEST FRESH DOG FOOD
We Like: The Farmer’s Dog – A couple months ago we started feeding Raven fresh dog food and she loves it! Get 50% off your first order of The Farmer’s Dog.
Check out more of our favorites on our New Puppy Checklist.