
How To Clean A Cat’s Ears – Top Dog Tips

Some cat owners forget to clean their pets’ ears, but ear care is extremely important and should not be overlooked. Learning how to clean a cat’s ears will prevent health issues, help you deal with a number of ear problems as well as ear infections, and save you money in vet bills.
There are several reasons why I regularly check and clean my cats’ ears. It gives me an opportunity for regular inspections to detect infections, ear wax build-up, ear mites and other possible issues. If you notice any problems during these routine inspections, you’ll have a better chance to avoid serious complications down the road.
Ear problems are one of the most commonly seen health issues in cats. This is because unbeknownst to many pet owners, cats actually have very sensitive ears that are prone to a variety of health issues. Early detection and prompt treatment can reduce the risk of hearing loss and will relieve discomfort for your kitty.
It takes about 30 seconds to check your cat’s ears, and about 5 minutes to clean them. Even if you have multiple cats (like I do), this will take a small amount of time each month, and will aid in your pet’s overall health and well-being. Plus, it will get easier over time as your cat gets used to the process and you get more proficient at cleaning her ears.
How To Clean A Cat’s Ears
 1. Preparation

The first step in learning how to clean a cat’s ears is preparation. Make sure the ear area is completely dry and any matted or tangled hair around the ear is properly cared for. You don’t want to cause your cat any discomfort while cleaning her ears or your pet won’t be very receptive to it next time.
You will also need to gather the necessary supplies. You will need to buy a quality cat ear cleaner that is specifically made for cats only. You will also need cotton balls. I cannot stress enough how important it is that you NEVER use cotton swabs (like Q-tips) to clean your pet’s ear.
Note: The reason why q-tips are not good to clean cat’s ears is that it’s very easy to push them too deeply into the ear. Unlike cleaning your own ears, you won’t feel when you push it too far, and you will cause damage. You don’t actually want to get into the inner ear. This could result in permanent damage to the ear and your cat’s hearing.
2. Inspect the Ear
Once the grooming is finished and you’ve prepared the necessary supplies, it’s time for an initial ear inspection. This is a very quick process, but also the most important step before you learn how to clean a cat’s ears.
Start by feeling the ear flap and the area around the ear with your bare hands. You should be looking for lumps, lesions, swelling, redness, discharge of any kind or anything else that doesn’t look right.
If you notice anything out of the ordinary, you need to call your veterinarian immediately. I explain the importance of this in my video, as most owners think that a thorough ear cleaning will help to solve any issues. However, cleaning a cat’s ear when there is already an issue could make the problem worse.
If you don’t spot anything out of the ordinary, you can start the ear cleaning process.
ALSO: 21 Strange Cat Behaviors – What It Means and How To Respond

3. How to Clean A Cat’s Ears
After you confirmed that your cat’s ears look healthy, move onto the cleaning process.
1. Fill the ear with cleaning solution
Cats’ dispositions and temperaments can vary greatly. Some cats may just lie in your lap while you clean their ears. Others will put up a much bigger struggle. As I demonstrate in my video guide, you can wrap your cat in a towel if she struggles while you’re holding him.
To begin, access your cat’s ear by tilting her head to the side slightly. Pour a small amount of cat ear cleaning solution (just enough to fill the ear canal) right into your pet’s ear. Your cat will immediately want to shake her head, so be sure to brace for it.
2. Massage the ear
Start rubbing the base of the ear in a circular motion, gently and slowly. This will help the solution to break up any wax build up. Massage the base of the ear for about 30 seconds. After you’ve finished, let your cat stand up and shake her head. Don’t worry, this is a natural instinct that your cat will do without hesitation.
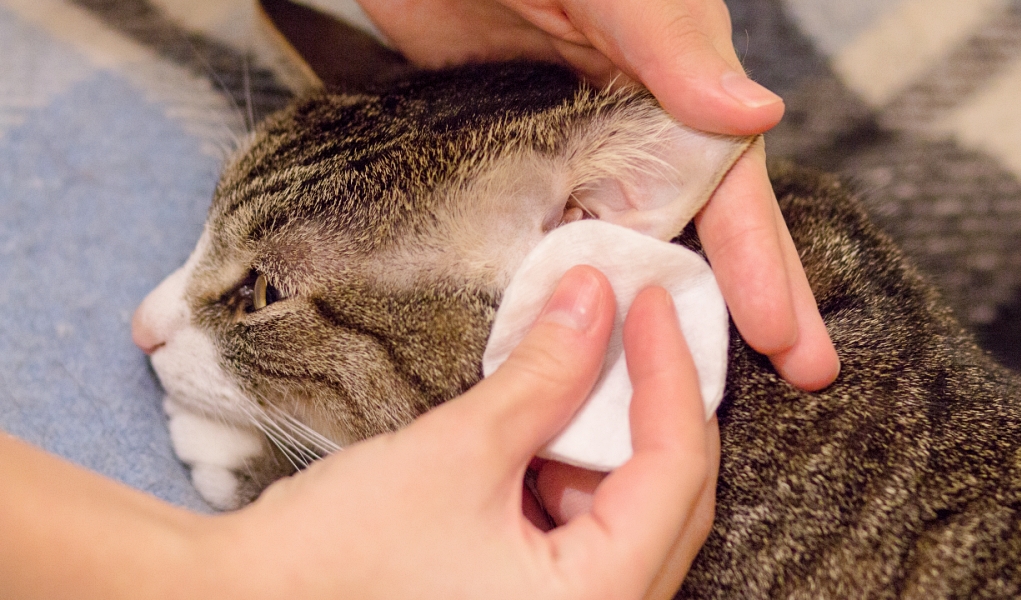
3. Wipe the inside clean
After your cat shakes her head, it will break up a lot of the wax and bring it out of the canal. Gently wipe the inside clean with a cotton ball. You don’t need to wipe the ear completely clean. Just gently wipe it until you’ve gotten the bulk of the debris and wax out.
4. Do not dry the ear
The process stops here. A cat’s ears are designed to dry themselves, so you don’t need to worry about getting every drop of solution.
Note: While this technique on how to clean a cat’s ears is important, picking out an effective cat ear cleaning solution is just as essential. Do NOT confuse feline ear cleaners with cat ear infection treatments (used for a specific health problem). These products contain different ingredients and cannot be used interchangeably.
4. How Often to Clean Cat Ears
When I talk about how to clean a cat’s ears, the most common question that I always hear is, how often should I clean my pet’s ears? The answer depends on many factors. It can be anywhere from every 2-3 weeks, to every 2-3 months.
Your cat’s breed, age, activity level, coat type and level of earwax production will all determine how often her ears will need to be cleaned. Generally, at least inspecting the ears should be done once per week to make sure there’s nothing abnormal.
A brief conversation with your vet will help you find the right answer to this question. On average, most cats should have their ears cleaned about once every 3 months, but your cat may need it more frequently or less frequently. Talk to your veterinarian to decide on the best schedule for your kitty companion.
READ NEXT: How To Clip Cat Nails – A Step-by-Step Guide
Related